ELK入门实践
ELK主要由Elasticsearch、Logstash、Kibana三个软件组成,用于日志的快速搜索和分析。官网地址:elastic
- Logstash: 将log进行处理后存入Elasticsearch中
- Elasticsearch: 存储log,建立索引,提供搜素(过滤、聚合),支持横向扩展、高可用
- Kibana: 将Elasticsearch中存储的log以图表的方式展示出来
由于Kibana现在还没有联合查询的功能,所以本文采用Kibi(Kibana的一个fork增强版本)。
对于ELK的快速入门书籍可查看:ELKstack 中文指南,详细了解的话请参考官方文档。
本文主要讲述了使用ELK进行日志分析的实践,以分析我们开发组开发环境的nginx access log为例子。
配置nginx access log格式
为了方便在logstash中处理log,这里配置下nginx access log为json格式:
1
2
3
4
5
6
7
8
9
10
11
12
13
14
15
16
log_format json '{"@timestamp":"$time_iso8601",'
    '"host":"$server_addr",'
    '"clientip":"$remote_addr",'
    '"nick":"$cookie_km_uid",'
    '"size":$body_bytes_sent,'
    '"response_time":$request_time,'
    '"upstream_time":"$upstream_response_time",'
    '"upstream_host":"$upstream_addr",'
    '"upstream_status":"$upstream_status",'
    '"http_host":"$host",'
    '"url":"$uri",'
    '"request_url":"$request_uri",'
    '"xff":"$http_x_forwarded_for",'
    '"referer":"$http_referer",'
    '"agent":"$http_user_agent",'
    '"status":"$status"}';
启动elasticsearch,添加Indices,配置mapping
为了使用联合查询,elasticsearch需要安装一个插件:SIREn Plugin 然后启动。
这里我设置的indices不以logstash-*这种形式,因为像logstash-*这样命名的indices会应用默认的logstash index模板,通常不会是我们想要的。我们可以通过自己设置index模板或者设置mapping来达到数据的映射需求。
设置mapping:
nginx log的mapping设置如下,保存到mappings/AccessLog.mapping文件中。
1
2
3
4
5
6
7
8
9
10
11
12
13
14
15
16
17
18
19
20
21
22
23
24
25
26
27
28
29
30
31
32
33
34
35
36
37
38
39
40
41
42
43
44
45
46
47
48
49
50
51
52
53
54
55
56
57
58
59
60
61
62
63
64
65
66
67
68
69
70
71
72
73
74
75
76
77
78
{
        "mappings" : {
                "_default_": {
                        "dynamic_templates": [
                                {
                                        "notanalyzed": {
                                                "mapping": {
                                                        "type": "string",
                                                        "index": "not_analyzed"
                                                },
                                                "match": "*",
                                                "match_mapping_type": "string"
                                        }
                                }
                        ],
                        "properties": {
                                "agent": {
                                        "type": "string"
                                },
                                "clientip": {
                                        "index": "not_analyzed",
                                        "type": "string"
                                },
                                "host": {
                                        "index": "not_analyzed",
                                        "type": "string"
                                },
                                "http_host": {
                                        "index": "not_analyzed",
                                        "type": "string"
                                },
                                "nick": {
                                        "index": "not_analyzed",
                                        "type": "string"
                                },
                                "path": {
                                        "index": "not_analyzed",
                                        "type": "string"
                                },
                                "referer": {
                                        "type": "string"
                                },
                                "request_url": {
                                        "type": "string"
                                },
                                "response_time": {
                                        "type": "double"
                                },
                                "size": {
                                        "type": "long"
                                },
                                "status": {
                                        "type": "long"
                                },
                                "status": {
                                        "type": "long"
                                },
                                "upstream_host": {
                                        "index": "not_analyzed",
                                        "type": "string"
                                },
                                "upstream_status": {
                                        "type": "long"
                                },
                                "upstream_time": {
                                        "type": "double"
                                },
                                "url": {
                                        "type": "string"
                                },
                                "xff": {
                                        "index": "not_analyzed",
                                        "type": "string"
                                }
                        }
                }
        }
}
执行:
1
curl -XPUT 'http://localhost:9200/nginx-access-log' -d '@mappings/NginxAccessLog.mapping'
users info的的mapping设置如下,保存到mappings/AccessLog.mapping文件中。
1
2
3
4
5
6
7
8
9
10
11
12
13
14
15
16
17
18
19
20
21
22
23
24
25
26
27
28
29
30
31
32
33
34
35
36
37
38
39
40
41
42
{
        "UsersInfo": {
                "dynamic_templates": [
                        {
                                "notanalyzed": {
                                        "mapping": {
                                                "type": "string",
                                                "index": "not_analyzed"
                                        },
                                        "match": "*",
                                        "match_mapping_type": "string"
                                }
                        }
                ],
                "properties": {
                        "nick": {
                                "index": "not_analyzed",
                                "type": "string"
                        },
                        "name": {
                                "index": "not_analyzed",
                                "type": "string"
                        },
                        "work_type": {
                                "index": "not_analyzed",
                                "type": "string"
                        },
                        "level_name": {
                                "index": "not_analyzed",
                                "type": "string"
                        },
                        "post_name": {
                                "index": "not_analyzed",
                                "type": "string"
                        },
                        "gender": {
                                "index": "not_analyzed",
                                "type": "string"
                        }
                }
        }
}
执行:
1
curl -XPUT 'http://localhost:9200/users-info/_mapping/UsersInfo' -d '@mappings/UsersInfo.mapping'
配置logstash导入users信息
users信息保存为每行为json格式的文件,logstash的配置文件如下:
1
2
3
4
5
6
7
8
9
10
11
12
13
14
15
16
17
18
19
20
21
22
23
24
input {
        file {
                path => "/home/roketyyang/users.json"
                start_position => "beginning"
                codec => json
                sincedb_path => "/dev/null"
                ignore_older => 8640000
        }
}
filter {
        mutate {
                remove_field => ["@timestamp", "@version"]
        }
}
output {
    elasticsearch {
        hosts => ["127.0.0.1:9200"]
        index => "users-info"
        document_type => "UsersInfo"
        workers => 1
        flush_size => 200
        idle_flush_time => 5
    }
}
执行(–verbose参数用于显示一些debug信息,有时候需要用到–debug参数以显示更多debug信息帮助我们了解命令执行情况):
1
bin/logstash -f conf/users.conf --verbose
因为用户信息只导入一次,所以导入完成后就ctrl+c终止就行了。
配置logstash导入nginx access log
配置文件如下:
1
2
3
4
5
6
7
8
9
10
11
12
13
14
15
16
17
18
19
20
21
22
23
24
25
26
27
28
29
30
31
32
input {
        file {
                path => "/data/logs/tang_nginx_access.log"
                start_position => "beginning"
                codec => json
        }
}
filter {
        mutate {
                split => ["upstream_time", ","]
                split => ["upstream_host", ","]
                split => ["upstream_status", ","]
        }
        mutate {
                convert => ["upstream_time", "float"]
                convert => ["upstream_status", "integer"]
                convert => ["status", "integer"]
        }
        mutate {
                remove_field => ["@version"]
        }
}
output {
    elasticsearch {
        hosts => ["127.0.0.1:9200"]
        index => "nginx-access-log"
        document_type => "%{+YYYY.MM.dd}"
        workers => 1
        flush_size => 200
        idle_flush_time => 5
    }
}
执行
1
nohup bin/logstash -f conf/nginx.conf -l logs/logstash-nginx.log >> logs/logstash-nginx-demo.log 2>&1 &
启动Kibi
1
nohup bin/kibi -l logs/kibi.log >> logs/kibi-demo.log 2>&1 &
访问kibi
通过浏览器访问kibi所在host的5606端口(默认监听端口),首次进入我们需要创建index patterns。
nginx-access-log:

users-info(因为去掉了@timestamp字段,所以就不勾选Index contains time-based events选项了):

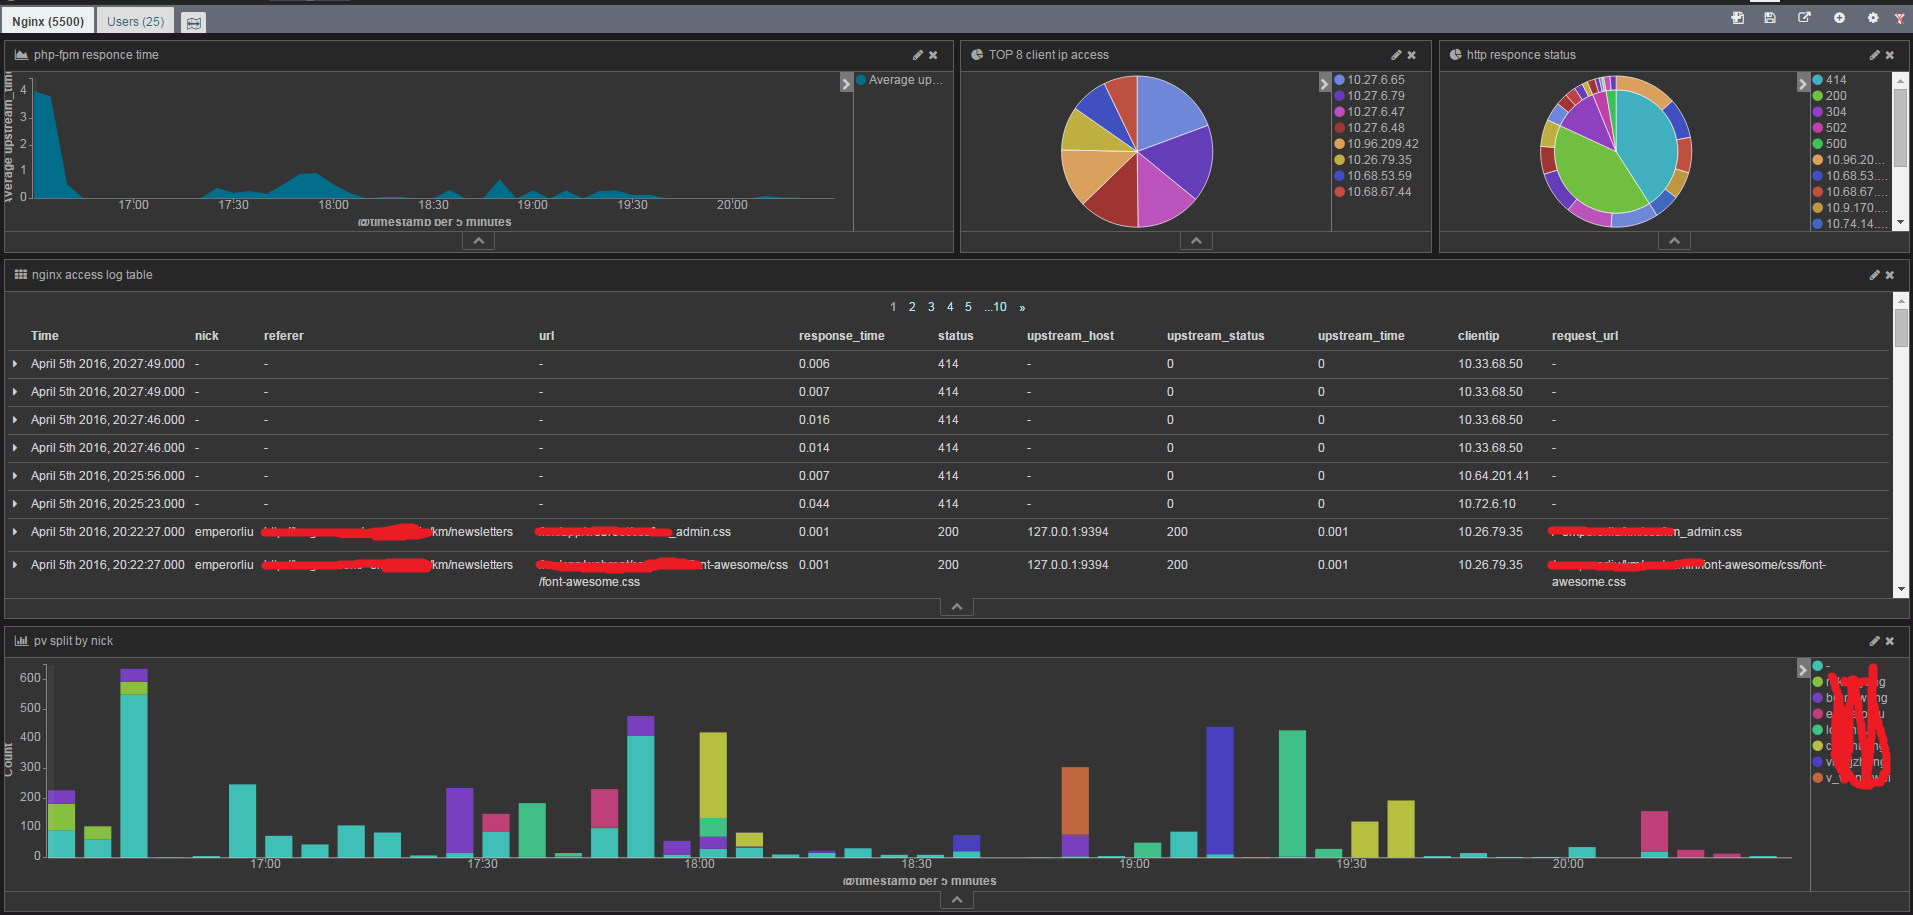
之后就可以按照各自的需求去创建数据报表了,我创建的报表如下:

使用关联
users-info.nick与nginx-access-log.nick是对应关系的,Kibi提供了关联两个dashboard的功能。所以这里创建了两个dashboard:Nginx、Users。为了使用Kibi Relational Browsing,Nginx、Users得设置与其相关的saved search关联。
以Users为例,如下:

saved search的创建是在discover中的:

接着在Settings->Relations中定义好映射关系:

切换到dashboard,勾选下图的复选框就能实时关联两个dashboard了:

例如勾选后,Nginx(6405)变为Nginx(3808),Users(25)变为Users(7)了,这是个inner join的关联:

dashborad中展示的图表中的数据也会相应的变化。
另外也可以使用Visualize->kibi relation filer功能,该功能类型left/right join的关联,如下我配置了一个在Users Dashboard中使用的relation filer:

在Users Dashboard中将上面的relation filter添加进去后(3459表示当前的Users(25)中有多少条nginx access log):

点击这个relation filter就会跳转到Nginx Dashboard了,并且展示这3459条记录的图表信息。